Wednesday, August 31, 2016

Reviewing Notes and Files

Today I decided to research Mabel Hiltz Buehring’s family a little more. Mabel is my great-father’s sibling. I decided to research her after visiting the Winnebago Court House in Oshkosh, Wisconsin yesterday while researching my husband's family. I decided to looked up Mabel’s daughter, Mildred’s death information because I realized I never recorded this information. Since I had photographed her grave last year I wanted to complete the process.

As I was inputting the daughter’s information into my genealogy software package, I realized I did not have death information on Mabel or her husband, William George. I decided to see if I could find anything on the family and proceeded to use FindAGrave.

FindAGrave not only had her grave information but her husband and another daughter, Mabel. This blew my mind. I didn’t know she had a fourth child. However, I must have known, because lo and behold there she was in my genealogy software package. This was a still an exciting find.

I had found her via the 1911 Canadian Census record and recorded this information previously. Looking at this little family group, I realized I had more missing information then known facts.

After recording the FindAGrave information which was recently added as of late fall last year, I proceeded to look for the family in additional Canadian Census records via Ancestry.com. This became quite difficult for some reason. Typing in the family name of Buehring, Behring, Buhring, was producing no good results or way too many results. Typing in the family unit’s first names only wasn’t providing the results I wanted either.

I decided to try FamilySearch and found the family in the 1916 census; however FamilySearch did not have an image or a link to the image on Ancestry. Taking the information I found on FamilySearch.
I moved back to Ancestry and used their search – Census and Voter lists function to narrow down my search category to Canadian census Collection, 1851-1916. After which I was able to open a window for each the 1916 and 1921 Census of Canada.

I decided to browse this collection and had to specify the Province, District and Sub-district based on my FamilySearch results.
I then proceeded to page 8 and found my family on that page.


After recording the census fact for each family member, I needed to find them in the 1921 Census. I decided I was going to try the same location as the 1916 census.


This time, it appears that Township 27 is in Sub-District 8 and not 7. Plus I don’t have the advantage of know what page number, but I figure if there were not many images, I would page through them.

However, this wasn’t as easy as I had hoped. The image order didn’t seem to match what I was hoping to find. Even though my previous attempt of using Ancestry.com didn't produce the desire results, I decided to use only the family first names and the age of the head of household along with Exact set for both his birth date and place in the search box for the 1921 census as follows:


I stuck gold when I found them on the first page of hits of 215 matches.


Now I saw the problem in the transcription of the last name. It was transcribed as Buckring instead of Buehring. I never thought of that misspelling before, I made a note that perhaps if I used Bu??ring for my searches might help find them in the future.


I still haven’t found Mabel’s two sons’ death dates but a little more research found that each had finally married and Paul’s wife’s name is Effie and George’s wife’s name is Martha. Paul was married prior to a 1945 Voter registration list and George was married between 1953 and 1962, because in 1953 he has no wife but in 1962 he has a wife.

However at this time, I am unable to find anything new on the two remaining sons and decided this was a good time to break from this little family research project.

Monday, August 22, 2016

Fixing the Gender in my Family Tree Maker File

I think I may have found a glitch in the Family Tree Maker 2014 (Ancestry version) software program. While running a Kinship report, I found two individuals that were showing as grandchild instead of grandson or granddaughter.

When I looked at the record in the person view, they should the proper gender.


However, when I view them from the edit screen, the gender shows up as Unknown.


Normally, I would just click on the down arrow and change the selection from Unknown to male or female; however it was not staying as my choice.

I thought I would try to change the gender back on the person view to unknown and then change it on the edit view, but that didn’t work either.

Finally, I created a new stand-alone, unrelated person with the same name as my problem person, making sure I specify the gender properly.

While still having my unrelated individual selected, I selected Person – Merge Two Specific Individuals and I select the problem person. This way the problem person facts merge into my new unrelated person.


This fixed my gender problem. I don’t know how this glitch came into my database. I must admit this is a project database, where I have been creating it through the Ancestry side of things and then syncing to Family Tree Maker. Normally I don’t add people this way. Normally, I manually add each individual on Family Tree Maker and then manually had all my facts and source citations. I would then sync back to Ancestry.

However on this project database, I have been following the shaky leafs and evaluating if they belong to the person in the database and if they do, I will merge the fact into my database. Perhaps the glitch is on Ancestry’s side and it created the two individuals improperly.  The only common source citation these two people had were Find A Grave records from Ancestry.com.


What I learned from all of this; is confirmation that by manually adding each individual, each fact and each source citation seems to keep glitches out of my “real” databases. It is a minor inconvenience in my project database but could had been a major annoyance had it been my “real” database. Then again, perhaps I better check my other databases and see if I have any unknown gender where I do know the gender.

Saturday, July 9, 2016

Facebook Genealogy User Groups


I belong to two genealogy software user groups, Family Tree Maker Users and RootsMagic Users.  Last week, a comment on one of these users groups caused a member to rethink why he joined the group.  I would consider this man the leading authority on using that software package. In fact, I know he has been helping people for as long I as I can remember which dates back to 1999 or 2000.

He became frustrated and posted the following commentI guess that you aren't allowed to ask questions of a User who is having a problem. They just up and delete the entire message after I stopped doing what I was doing to help this user out. I am supposed to magically understand what they are doing. < / frustrated >.

Someone responded… I'll admit, sometimes your questions are a bit gruff and come across as mean. I actually took a class on this so I don't take it that way. Socializing through the written language leaves out the real tones behind it, such as body language and facial expressions.

Too me, the response came across as condescending. Unfortunately, he decided to leave the FB group again since he was coming across gruff. (I don't blame him, the group will suffer without him).

Personally, I have been on the receiving end of people saying when I do follow-up questions (even in person) that I am gruff. For the record, No we are not gruff, we are to the point and ultimately, we want to help solve your problem. When someone runs into a “computer” problem or “software” glitch, we are just trying to gather enough information to recreate the problem. Our time is precious, and we want to get you up and running as fast as possible. So we are sorry if we don’t hold your hand long enough, or let you cry on our shoulder, but we are willing to take time out of our busy schedules and try our hand at helping to solve your problem. We understand that you might not clearly state your problem, but bear with us as we try helping you. We are just trying to "pay it forward". 

I join these groups for two reasons, I was hoping to learn how to the use the software packages better and to offer my help if I could on occasion. I do find that some of the questions are quite basic and if people would just take the time to do a little research first before jumping in and asking. I usually give myself a certain time limit to find the answer before I would ask my question. A lot of time I would find my answer and not need to ask any questions. Google is a great tool for finding solutions to a lot of problems.

Other times I find that question goes off base to general genealogy questions or about Ancestry.com. Usually someone reminds that person that the question is going off base and I am guessing the Facebook Administrator of the group closes down any further comments pertaining to the question.
My wish, if you figured out the answer, post a follow-up and thank everyone for helping and explain how the problem was solved so the rest of us “dummies” who are trying to learn a thing or two can benefit too.

Over all, do I find the user groups to be useful? Yes if we let the helpers help in the way they are accustomed to help and if the askers of question don’t get bent out of shape because we want to clarify your questions or ask follow-up questions to get to the root of the problem.

I personally, will take help where I can get it. I am not offended when someone asks me to clarify my questions or to answer follow-up questions. Ultimately, I want help and I want it now.


Finally, I want to thank everyone who has offered me help with any genealogy question or task that I had. Without a little genealogy kindness, where would anyone of us be? 

Tuesday, March 22, 2016

Adding a spouse in RootsMagic

During last week’s “share session” at my local genealogical society, I discovered that RootsMagic doesn’t always prompt you for a marriage date when adding a spouse. It all depends on how you add the spouse.

Coming from the world of FamilyTreeMaker, I find myself sometimes adding people from the Pedigree view in RootsMagic. Sometimes when I add a spouse from this way, I will not be prompted for the marriage date. Please note that it doesn’t always happen but it does sometimes when I add a spouse this way.

However, if I add a spouse from the “Family” view, I will be prompted for the marriage date.  I wasn’t sure if this was a design flaw or a design feature. I decided to look up spouse in my RootsMagic Manual and see what it says about adding a spouse.

The first way I found on how to add a spouse was through the “ADD” menu bar. Highlight the person you want and then select “Add > Spouse” command. This brings up the Add Spouse pop-up screen where I can add the person and some facts. When I click OK, this does bring up the Add Marriage pop-up screen where I can then add the marriage event. If I know a marriage has occurred but don’t know the date, I can still click “+ Add marriage event” and then leave the date and place blank.

Next it states I could highlight the person in Pedigree view, and then press the letter S on my keyboard and the Add Spouse pop-up screen appears.  This process appears to do exactly what the previous process does.

This completes all the ways that I found for adding spouse, via using the Index and looking up the keyword “spouse”.  However, I found that if you right click on the person you want, you can then select “Add > Spouse” and then actually add the spouse information. It doesn’t matter where the person’s name appears, whether on the Pedigree view or on the Family view.

However, if you add a spouse by clicking on the “+ click to add mother” or “+click to add father” in either the Pedigree view or in the upper half of the family view (small pedigree view), this doesn’t automatically add a spouse to the other existing person. You will need to add a marriage fact and then tie the mother and father together.

I have found myself just using the right click method of adding a spouse and I had no more problems. However, when I was deleting my test “spouses”, I found that it didn’t always clean up the file as I had expected.

If you delete a spouse where there are no children, I found that it removed all traces of the marriage, the spouse and the marriage date. See examples below.


However, if you delete a spouse where children exist, it will delete the spouse but keep the marriage date. See examples below.


Now I don’t know if I like how it handles the delete a spouse. Perhaps it should have asked if I wanted to delete the marriage fact too. Perhaps I added the spouse to the wrong John Smith, we all have those family names that keep occurring in our trees. It is real easy to select the wrong person and add a spouse and marriage information. 

I learned several important lessons. When learning a new program, perhaps refer to the manual and use the same steps (process) for doing simple tasks. It is nice that programs offer us multiple ways to input data, because we all think different, but once we figure out a way that seems to produce the results we like, keep to the same steps.


Second lesson I learned, to double check your work, especially after deleting a person. Check the person they were attached to and make sure all related facts are gone. I wonder how many marriage facts I thought were deleted and never were? 

Friday, February 5, 2016

Finally Get Organized with Evernote!

As I review the checklists from DearMrytle's Finally Get Organized!, I realized that I could use Evernote to help me to Finally Get Organized!

Ol'Myrt suggested that our digital files be organized like our "Binders". She also suggested that we start with our main surname or in my case, my maiden name for the first four generations (Me, my parents, my grandparents and my great-grandparents). 

Sometime last year, I purchased the book, "How to Use Evernote for Genealogy" by Kerry Scott. I had the best intentions, like many of us, to read this book and to utilized Evernote more for my Genealogy research. The book cover even hints at this with the sub-text of "a Step-by-Step Guide to organize your research and boost your genealogy productivity." However, that wasn't even enough for me to get beyond the first chapter of the book until DearMrytle's Finally Get Organized! Weekly series of checklists.

In chapter 3 of this book, Organizing in Evernote, gives examples on How to Use Notes, Notebooks, and Stacks for Genealogy. Even though her exact examples are not exactly how I need to organize my files to match my Binders, she leads me in the right direction.

Stack 1: Maiden name
   Notebook1: Me
        Note 1: my birth certificate
        Note 2: baptism certificate
        Note 3: my first holy communion certificate
        Note 4: my high school diploma
        Note 5: my marriage certificate
   Notebook 2: my parents
        Note 1: their birth certificates (I could have one note with both) or two separate notes for each
        Note 2: religious certificates
        Note 3: their marriage certificate
        Note 4: their death certificates
    Notebook 3: my grandparents
        Separate notes for certificates, pictures, documents and census records (to name a few)
    Notebook 4: my great grandparents
        Separate notes for certificates, pictures, documents and census records (to name a few)

Stacks and notebooks and notes can be sorted by Title, alphabetically or reverse alphabetical order. If you put a Period (.) infront of the Title, it will sort first, numbers are sorted next and finally, letters. So when you are working on a certain Stack surname, just change the title to include a period (.) and it place it on top of your list of stacks, where you can find it quickly. When you are done working on that surname, just remove the period and it will sort alphabetically by surname. Number your notebooks to help organize them in the order you want, or label them Generation 1 - Me, Generation 2 - my Parents. You can always use actual names instead of Me or my Parents. Start off your notes with the year, and your notes can be sorted chronologically. Now you have created a timeline for each generation with little or no effort.

Did you know that you can take pictures of your existing notes? When you photograph documents, you unleash the power of Evernote's indexing for you. They will become searchable based on the text in the photo. How cool is that? 

Plus creating notes is no harder than using your existing wordprocessor. You have different fonts and sizes, colors, bold, italics, underline, highlight. You can even create tables for Research and Correspondence  logs. Remember, all these become searchable. Instead of separate documents on your computer's hard drive, that you rely on naming conventions to find what you are looking for, you just type in a search word or phrase. Plus if you tag each note with a special phrase or keywords to add additional search words that is not found in the actual document or note, those notes can be search on those tags too. Think about adding a woman's maiden name as tags to documents that only have their married name in them. 

Notes can be a collection of other notes, they can contain multiple pictures or documents. The only thing to remember is that you need not exceed the 25MB note size for free accounts. Paid accounts increase their note size.

One of the most important features of Evernote is that it can be sync across multiple devices. This means I can carry all my genealogy files with me, all the time. Since I have Evernote on my iPhone, I can access my files wherever I have a phone signal. Paid accounts can get offline access on mobile devices if you think you will be someplace where there is no phone signal. 


There is so much more I can do in Evernote to Finally Get Organized! And I will try to cover those later, because right now I am going back to work on my first four generations of my surname in Evernote. 

Sunday, January 31, 2016

Finally Get Organized! -Week 4


First of all I want to thank DearMyrtle for taking a slight break from our getting organized and looking at “pay back time”. See her blog for this week at http://blog.dearmyrtle.com/2016/01/finally-get-organized-24th-31st-jan.html.

Her first two suggested tasks this week involve FamilySearch.org.

1 – Volunteer at FamilySearch Indexing – helping with indexing is easier than you think. If you only volunteer one hour a week, that would end up to about 50 hours a years. Or volunteer one week a year for about 20 to 30 hours. I find the one hour a week is easier and keeps my work fresh. Trying to index too much in one day can be exhausting. When we get exhausted we make mistakes. So try your hand at Indexing and “pay it back”, this was the main reason I started volunteering.

2 – Learn to browse the image collections at FamilySearch.org – this is a feature that many don’t realize they can do. Before a collection is index, you can only access the collection by browsing. For those of you who don’t know about browsing, it is similar to viewing records via microfilm. In this electronic age of genealogy, many “new” researchers get spoiled by thinking they can find everything on-line via an index. I have spent many an hour at the library, scrolling through microfilms. See Ol’ Myrt’s blog for wonderful examples on how to tell which collections you can only Browse. This was a wonderful reminder for me, since I too, rely too much on indexed collections.

3 – Create surname binders for yourself (if female) and your mother’s maiden name, but leave them at that for the moment. Again, I am working with folders, I totally understand handing a binder to a non-genealogist family member is a wonderful idea, but I and binders don’t get along real good. Plus I have started that folder system years ago, and I am not willing to give it up quite yet.  

4 – Update your genealogy program to include your siblings – with birth and marriage information. Make sure photos and documents are transcribed and cited before attaching to the appropriate individuals as well.

Even though I still haven’t gotten caught up on my previous tasks that need to be done, I just add these additional people to my to-do list and continue working on the list.

So back to Finally Get Organized! Checklists.

Finally Get Organized! - Week 3

DearMyrtle warns us that “This Week has a mighty big assignment” – see her complete blog at http://blog.dearmyrtle.com/2016/01/finally-get-organized-jan-17th-23rd.html.

Step 1 – Transcribe every document you’ve collected on the first 4-four generations in your surname/maiden name binder. If this was the only step, this would be still a big assignment. I do believe in transcribing every document even though I haven’t done this always in the past. Not having to re-figure out handwriting every time you re-access a document is handy. I also find that when you transcribe the document, you find many more hints because you have to type and read every word. I had transcribed portions of documents before, for example: I have typed each line from a Census record and record it as part of the citation comment field for the individual. Transcribing my documents are going to take me more than one week, I plan on making a list of all the documents in each of my surname folders (one for each generation). I can leave that checklist on my desk and check off each document as it gets done. I plan on spending about an hour each day doing this task until they are done. I find if I do this first, when I am fresh and limit myself to only an hour each day, I will get the best results and not rush through the task and make errors.

Step 2 – Refile each document in the Surname/Maiden name binder.  All my documents are already filed in my surname folders. However, unlike Ol’ Myrt, I don’t file my digital files by surname. However, I do see the advantage of filing by surname. I originally started filing my documents by type, especially census records, where multiple families could be found on the same page of a census page.

While Ol’ Myrt gave the following examples as her naming convention
  • 1918FROMAN_Lowell_WWI_USDraftRegistration_1185_A780
  • 1925FROMANLowell_GOERING_MarriageApplication_JacksonMissouri_A16869
  • 1925FROMANLowell_Goering_Marriage Certificate_JacksonMissouri_A16869
  • 1930FROMANLowell_Census_WashingtonChelanWenatcheeDistrict46Page29

I have used similar naming conventions for the first three, but for census records I differ. My naming convention would be…
1930USCensus_Washington_Chelan_Wenatchee_District46_p29

I use the underscore between each location, because I find it easier for me to find what I am looking for.

My files are stored in sub-folders under my genealogy folder, as follows:
  • Genealogy/Records/Vital Records/Marriage
  • Genealogy/Records/Vital Records/Birth
  • Genealogy/Records/Military/WWI
  • Genealogy/Records/Census/1930

However, as I have been working on certain surnames, I have started a surname folder under the Genealogy folder.  I have a genealogy friend that files by generation under the surname folder. Generation one is the first person who is in your family with that surname. Since we are working on our birth surname, generation one would be ourselves, generation two our father, three our grandfather, and four our great-grandfather.

Ol’ Myrt is trying to achieve the following:
  • transcribed word for word
  • cited to include where the original document was located at the time you obtained the copy.
  • attached to each person mentioned in the document within your genealogy management program.
  • filed in the binder where the person is a child if the document is about his childhood) or behind the family group sheet where he is married if the document is about his time after marriage.
  • filed digitally in his surname folder on my hard drive


Her goal is to have the binders read like a coffee table book and that our digital drives must be organized in the same manner for consistency. This is an excellent point, and now I am rethinking my digital file system. Consistency is the key to everything. Since we are doing a lot of this for the non-genealogists in our family, especially those who might find our work after we are gone, they need to see the importance of our work.

Good thing for me, that moving the location of a digital file is as easy as moving a paper document to a different folder. 

Back to work to Finally Get Organized!


Wednesday, January 20, 2016

Finally Get Organized! – Week 2


Well, I am already a week late on getting this blog post out. Not a good start on Finally Get Organized, but I am hanging in there and decided to record my progress.


For those of you, who might have come to this week first, this is thanks to DearMYTRLE’s Finally Get Organized blog. Check out this week’s blog at http://blog.dearmyrtle.com/2016/01/finally-get-organized-jan-10th-16th.html

First, back up your data – This is a great suggestion, because I did lose some of my information that I had on an external hard drive. I took this drive last summer with me to my summer home and I could not access any of the data. Plus the last time I did a backup was the previous November.  Lucky for me only my genealogy supporting documents were on this drive, and my genealogy database was on Dropbox along with the media file attached to it. So I might have lost some documents that I save first to my external hard drive, then I create my source citation and attach the document to the citation. If I failed to attach it to my citation, I at least have my citation and I am able to re-find the item and save it again. Therefore, I have been trying to come up with a monthly backup plan, such as a cloud based option along with another external hard drive option. Also, I will be copying my genealogy folder from my external hard drive to a flash drive, with a folder called “working” and any new data will be place into the working folder and the rest of the flash drive will be for reference only.  This flash drive is all I will take with me to my summer home.  My next step is to research cloud storage.

Decide on a genealogy management program – For me this is Family Tree Maker. I have been using this software package since about 1997. Now that Ancestry.com plans to retire this software package, doesn’t mean I am jumping ship quite yet. However, I have started learning RootsMagic before Ancestry’s announcement and I am looking at cleaning my FTM files in case I need to switch quickly to another program.

Starting with yourself, ensure you’ve entered your personal data and that of the three older generations by that surname in your chosen genealogy management program.  This is my first project I am handling this week. I know I have those three generations in my program, but I am going to revisit each of these individuals, verify the place names, the citations and any media files attached. I will make sure that they are complete, and if I am missing anything, to create a to-do list of the missing items. 

Set aside a 3-ring binder for your surname – This I started years ago, because didn’t we all start with our surnames (maiden name for me)? ;-)

Label oversize tabbed 3-ring dividers and insert in the surname binder – I must admit that I am missing this item. However, I am not real big on binders either. I see where Ol’ Myrt is going with this, but I already have file folders in my hanging file drawer separated by the suggested generations.  Therefore, I don’t know if this is really what I want to do at this time.

Place the 4 family group sheets behind the appropriate generation dividers in your surname binder – Again, if I am staying with my hanging file folder system, I will put those family group sheets as the very first item in my file folders.

Scan and file photos and documents relating to each of these four generations in your surname/maiden name binder – This is exactly what I already have in each of my file folders. Ol’ Myrt suggested downloading documents from the Internet and this is exactly what I have done. I also have printouts of every census record found for these people.

As soon as you’ve scanned the, place all important “must save” photos and documents in top-loading page protectors. Done and done.  She stated that the rest of the photocopies may be discarded unless you are a die-hard paper-oriented genealogist. Yep, I am, I want paper especially for my direct line ancestors.

Create an introduction for those that follow – Great idea, having an introduction to quickly orient those who find your work later. You hate to have someone just throw away your paper files and erase or discard your digital work too.

Now the hard work, doing all the little steps that make up the introduction. I must admit, this is going to take me more than a week. I could easily see that I could use a binder just for this introduction. Explaining my file naming conventions, the locations of my files and my filing system, listing all my database files, where they are stored on my computer and which on-line websites might have a version too and how in-depth of a version.

Finally, adding a “genealogy codicil” to my will. I guess I need a will first. All I know is that I have threated my children, that if they get rid of my genealogy, that I will come back and haunt them. I guess this will not hold up in a court of law.

This week’s checklist has me looking at my genealogy with a whole new pair of eyes.  Now all this extra work might feel as if it takes the “fun” out of genealogy and from making new discoveries, however it also allows me to make sure my research is complete and meaningful to the next generation after me.

Back to doing all the steps.

Tuesday, January 5, 2016

Update – My First Attempt to Export FTM to RootsMagic

RootsMagic has created an update that fixed some of the problems I had in my previous blog as follows:


FIXED – Sources tied to the name facts are now showing up on the person profile page as follows:


FIXED: I thought I lost my citation text that I had with the source. However, I do now see it in the research Notes for the source. Don’t know if this is where I would want it, but it is not lost. Solution might be for me to look at what I am putting in my citation text on FTM. Perhaps it really should be text from the source.  This could just be my misuse of the field on FTM.

Partially Fixed: Previously my description notes from FTM were placed in the Person Detail notes for the fact and I lost the fact notes. Below is what it looks like on FTM.

This is partially fixed because now my fact note does appear in the fact note on RootsMagic and I think they were trying to put my description into their Place details, I see it under the Facts detail where it puts the Place details first and then the Place location. However, I can’t edit it, because it is not in the Place details fields. (ALMOST but NO CIGAR)


I am very happy to see that the RootsMagic developers are trying to help all us users of FTM to make the transfer to their software as painless as possible.  Therefore, before I was a little disappointed but now I am becoming more hopeful. Even though I am not jumping ship from Family Tree Maker at this time, mainly because “if it is not broken, don’t fix it”. However, I do need to have a back-up plan and I need to make sure that the data I am putting in FTM will export to Roots Magic in the way I really want it to, I need to know what to expect. Plus I need to learn Roots Magic.

I see two things I must do,.
  1. Look at all my source citations and verify what is inputted into the detail versus the text fields on FTM so that they come across in a useful manner for me on RootsMagic. This is a user problem (ME), not a RootsMagic software import problem.
  2. I also need to learn RootsMagic and thus I have started a new tree for my unknown DNA matches. Since this is just a working tree, for me to figure out relationships, I can learn RootsMagic by actually using it. I didn't want to start-over and recreate my tree that I have in FTM, I know I would get too frustrated. This is why I am starting a brand new tree that serves a brand new purpose.


Finally Get Organized! - Week 1

Looking through DearMyrtle’s Jan 3rd-9th2016 Checklist might look overwhelming at first, but with any big task if you break it down into smaller more manageable pieces it will be easier.


Step 1 – Clear off the computer desk and make piles for everything. She suggested five basic categories: to be filed letters/email to write, research to do, photos and books. I have a dedicated computer room that is just mine. I have a large u-shape desk. My two monitors are located in the middle desk area; therefore I have desk space on the left and right of me. I try to keep the desk space on the left clear for projects. The Right side does seem to gather junk, which I do try to keep in piles. Years ago, when I moved into my computer room, I had already decided to move from a binder file system to a well-organized hanging file folder system.  I also decided that nothing was going into this file folder system without being entered into my genealogy software. Therefore, I cleared out my old folders and binders and made a stack at that time. I have been attacking that stack, but I still have a stack about 12” high that needs addressing. I too had made piles before I started. However, I also had a garbage pile. I realized that some of my papers were obsolete. For example, when I used to belong to prodigy, I had printed out lots of messages and now those messages only had prodigy usernames, no real names, addresses or emails. This means these have no real research value anymore and thus I trashed them.  Therefore, I already am ahead of the game because I have those piles she mentioned.

Step 2 – Check your office supplies and replace any missing or lost items, so you will have all the necessary tools to keep yourself organized. I consider myself an office supplies hoarder, therefore I have this covered in spades. I also get plenty of pens, pencils, highlighters, post-it notes and such from a trade show that my husband attends every year. I come home with such a nice pile of goodies that I have decided to scale back. However, this year many of the vendors where giving away small flash drives, these come in handy for taking on research projects or trips. I can have one for each project or trip and not get the information lost on a bigger flash drive. So instead of piles of papers, I just end up with a container of flash drives (less mess). I can always print something out later if I really want a printout.

Step 3 – Setup your computer desk and office the way you really want it! Again – I am ahead of the game when I moved into my computer room this is exactly what I did. A couple of years ago, I realized the benefit of two monitors and when my computer died, and I bought a new computer that came with a monitor, I instantly had two monitors. Love it. 

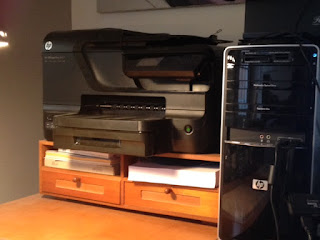
I have my all-in-one printer to the left of my monitors in that “dead” space that is too hard for me to reach stuff. Behind my desk I have cabinets that store all my paper and office supplies. The desk I picked out had a hutch with two closed areas and an open shelf area. I started putting my books in the open area and in one of the closed areas; I have all my computer manuals, software manuals, hardware manuals and such. This way I can find any disk that I might need to reinstalled.  In the other closed area, I have specialty papers and labels. I have a desktop printer stand so I can store extra paper under my printer (handy) and it has two drawers filled with post-it-notes and things. 

One of my monitors is on a riser and I store scratch paper and little project notebook and miscellaneous items. I have found by having everything within arm’s reach, makes my life easier.  I learned this from my working days.I did have to add a bookshelf next to my desk for my ever expanding book collection. Overall, I am pretty happy with my office layout, the biggest challenge is me where I don't put everything back when I am done.


Step 4 – Designate a special red clipboard as the “When computer Help Arrives” clipboard – Don’t need this because I am the computer nerd friend that my friends call. Therefore, I have to research all my own problems and try to figure it out. My backup plan is that I ask my eldest son for his advice and then go exploring some more on-line.


Step 5 – Designate a special green clipboard as the “Genealogy Challenges” clipboard – Currently I use my software package, Family Tree Maker for this purpose. I use my “private” research notes area to outline the basics of the problem and then create a to-do-list that references to look at my “private” research notes for this person.

I really liked that idea of a Snap and Lock file box for quickly storing papers from a recent research trip. Currently for me, those papers get placed on the corner of the right side of my desk. I must admit, this doesn’t really work for me and I don’t know why I keep doing it. I noticed I have stuff there from last year summer and now I have more to add from my October research trip. This is something I need to look more into.

As Ol’Myrt stated “it wasn’t that bad” and I can say “well not for me it wasn’t”. This is because I already had a big head start. My biggest challenge is to keep the left side of my desk organized and dealing with my recent research trip notes along with attacking the stack of old papers under my desk.  Okay - I do have other challenges, but these are the biggest with regards to Ol'Myrt's checklist.